
Required Software:
MPC-HC/MPC/Potplayer/KMPlayer (and probably other directshow players as well)
ffdshow video decoder (i.e. you don't need to install ffdshow dxva or ffdshow audio decoders)
Recommended Decoders for MPC-HC:
I strongly recommend to use the built-in DXVA decoders of MPC-HC for this purpose. If you can't use them for some reason, I recommend using the LAV video filters. Only if none of the above options work for you, then use ffdshow video decoder. In the latter case, I recommend using the wmv9 codec for VC-1 instead of libavcodec. The problem is that the accurate frame seeking in MPC-HC with libavcodec is kind of non-existent (not that wmv9 is that frame-accurate, either), which makes it PITA to work with. Unfortunately, ffdshow uses exclusively libavcodec for H.264 decoding.
Setup:
Remark: There are many options for the ffdshow OSD, so try to not make it overbloated and kitchy. It should be simple and informative. Also, sometimes it is recommended to choose different color given the overall background of a movie like for instance with Avatar. Adjusting the position of the OSD can be a bit tricky, because ffdshow raw is post-processing filter, thus with the default position, the OSD may happen to go outside of the frame. Taking the screenshots: Open a movie with MPC-HC. Somewhere in the left corner above you should see the OSD from the ffdshow video raw filter. Now, you can view the movie frame by frame by using the step button: 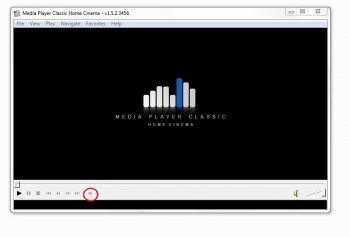 The only disadvantage is that there is no way to go backwards (or at least none that I know of). After you have found a good frame suitable for comparisons, press Alt+I to take the screenshot and save it as png. That's all, folks! If you use libavcodec, the step feature will be kind of broken and will keep skipping frames. However, it does that in a pattern, so if you do it right, you may still be able to take screenshots of matching frames... Please note that I do NOT use this method. But it is useful for folks that want a simple solution. II. Method - using Avisynth and AvsPmod: This method is much more powerful than the previous one because one can then utilize some neat features of Avisynth/AvsPmod that are not available with regular media players and that make doing frame comparisons slightly more comfortable. But it also requires a little bit of setup. In all three different setups I am going to present in the following, we will need the following two basic pieces of software: Avisynth AvsPmod Use the executable to install Avisynth. AvsPmod does not come with an installer: all you have to do is to unpack it to some folder of your liking and, say, make a link on your desktop to the avspmod executable from that folder. Taking the screenshots works the same way for all three setups: once you have opened the video in AvsPmod video preview and have found the frames you need, just right click on the frame and choose to save as. 1. Setup: using ffdshow + some source splitter This is a rather lengthy setup as it involves installing some additional software as well as setting preferred DS (direcshow) filters, but it is the only way if you want to combine the power of Avisynth/AvsPmod with the extensive OSD that ffdshow is capable of. Required software: ffdshow video decoder some splitter: recommended are Haali or LAV splitter from the LAV filters package Preferred Filter Tweaker (previously known as Win7DSFilterTweaker) if you are using Windows 7 (it may also work with Vista and XP, not sure about this as I have not tried it with them) and/or CodecTweakTool if you are using any version of Windows below Windows 7 Install ffdshow and the splitter of your choice. Make sure to select the decoders for the different types of video in the the ffdshow video configuration utility as explained above in the first method. Depending on your OS, fire up Preferred Filter Tweaker/CodecTweakTool and set ffdshow video as the preferred decoder for H.264, VC-1 and MPEG-2, and Haali/LAV/other splitter of your choice as the preferred source splitter for MKV and .ts/.m2ts (transport streams) as well as any other container as necessary. This procedure will set the default decoder and splitter Windows will be using for the specified video and container types. Remark: If you are using different decoders and splitters for video playback on your PC, go to the Options of your DS player (say, MPC-HC or Potplayer). There, you have to explicitly block the two filters from above (say, ffdshow and Haali) by adding them to the allowed filters and then setting them to disabled/blocked. The reason for this is that DS players pick per default the DS filters that are set to default in Windows (eh, kind of makes sense  ). ).Now, open AvsPmod and drap-and-drop your video source onto it. AvsPmod should then display something like this: Code
Press F5 to refresh and the preview window of AvsPmod will open under the script window, together with another window on the side showing the filters currently being used. Now, you can movie the slider under the preview button with the right-arrow-button on your keyboard. You can also pick random frames by pointing on the slider with your mouse, or you can enter specific frame number in the number field left next to the slider. Remark: Try to avoid using the backward direction because it will break the frame accuracy of ffdshow and the decoder will start skipping frames or showing incorrect frame numbers. If you have already gone 4-5 frames forward, you can usually go back 4-5 frames without problems, though. Going more frames backward might be problematic. Now, if you have two (or more) video clips you would like to compare, you can do the following thing: Code
then press F5. This will sort of merge both videos in one in such a way that each frame will be shown twice, the fist time being from video1 and the second time being from video2. You can browse is just the same way as above. The neat thing about this is that you can reach each frame of video1 or video2 and compare it directly with the matching frame from the other video source. Again, if you have already gone 5-6 frames forward, you can go 5-6 frames backward without problems. In particular, note that you can switch between 2 matching frames using the forward and backward arrow on your keyboard! Remark: Since you open two video sources with ffdshow, ffdshow becomes double less frame-accurate. Forget about jumping to random frames when using ffdshow. 2. Setup: using ffms: Required software: FFMS (download the one called ffms-2.xx.7z) This is the method I recommend. Even though FFMS does not have the extensive OSD capabilities of ffdshow, it has the basic ones, which is more than enough for most purposes. FFMS offers complete frame accuracy: you can go both forward and backward or random as you like and it will always show you the correct frames. FFMS wrote:
FFMS wrote:
Installing FFMS is fairly easy. Open AvsPmod, go to Help -> Open Avisynth Plugins folder. After you have unpacked the archive, you need to place all three files ffmsindex.exe, ffms2.dll, FFMS2.avsi, in the plugins folder of Avisynth. Now, open AvsPmod and, as before, drag-and-drop your video source onto it. This time, however, replace DirectShowSource by ffvideosource. You code should look something like this: Code
Press F5. Please note that AvsPmod will start loading and will appear to be "not responding" for a short while. Do NOT close the application. The reason for this delay is that FFMS will be building the index for the video file. The index file is built usually in the same folder as the video file and goes by the extension .ffindex. It is also part of the reason why FFMS is frame-accurate and is needed by FFMS. The good thing is that once it is built, you don't have to go through the same delay again. In fact, the same index may be used for different encodes of the same movie as long as the index name is matching the video file name. If you happen to delete the index file, FFMS will have to rebuild it again the next time it has to read the video file. Now, if you want some OSD, you have to add the following line to your script: Code
or Code
The latter one will just leave the frame number and the frame type in the OSD. If you don't know what cfrtime and vfrtime are, then you probably don't neem them, either  Furthermore, you can do the same tricks with Interleave (and much more if you know Avisynth) with ffvideosource instead of DirectShowSource as in the case with ffdshow. Remark: if you do lots of backward and forward and random frame seeking, the ffms OSD may not be able to keep up. So, it's always a good idea to press (F5) once in a while. More useful information about FFMS can be found in its User Manual. 3. Setup: using DGdecNV: This is another frame-accurate setup which, however, is suitable only if you have CUDA-capable nVidia gpu. Required software: DGDecNV Please note that this software is currently shareware. You can't really use it properly if you have not obtained a license. However, some of you might happen to have friends that might be able to help you out with that However, if you like the software or want/intend to use it for commercial purposes, I would suggest you to buy it. Lots of work from side of its talented author has been invested in that piece of software!There are also older rather experimental builds that are freely available. Consult the above page for more info. Once you have DGDecNV, place it in a folder of your liking and, say, make a link on your desktop. Then place DGDecodeNV.dll in the Avisynth Plugins folder. Fire it up, do not forget to choose to NOT demux the audio tracks from the Options menu, and drag-and-drop your video source onto it. Then press F4 to save the project: this will save its own index file to the same location as the movie file. Usually, the index file has a name of the type video.dgi. You can now exit the program. Open AvsPmod, drag-and-drop video.dgi onto it, and replace DirectShowSource by the string DGsource. Your avisynth script should look like this: Code
Press (F5). This will open the video preview of AvsPmod and you can start browsing frames. However, I am not aware of any OSD features of DGdecNV, so you will have to read the frame numbers from the little frame number box left next to the video slider. The lack of OSD (?) also probably makes it less usable for frame comparisons. You will notice, though, that the forward frame seeking with DGdecNV is quite faster than with ffdshow or ffms, which might be useful to some folks. Another advantage is that DGdecNV does not take any cpu for the decoding (since it uses CUDA for that). As with the other source filters, you can do whatever you want with the video file once opened in Avisynth/AvsPmod. There is also a free alternative to this based on LAV CUVID that probably has similar functionality as far as the AvsPmod preview is concerned, but more about this later. |
0 comments:
Post a Comment