Plugin here: http://sourceforge.net/projects/dvdadecoder/
FLAC here: http://flac.sourceforge.net/download.html
Install foobar2000 and FLAC. Next, install the plugin. Save the .zip file to somewhere easy to access, like your desktop or C: drive.
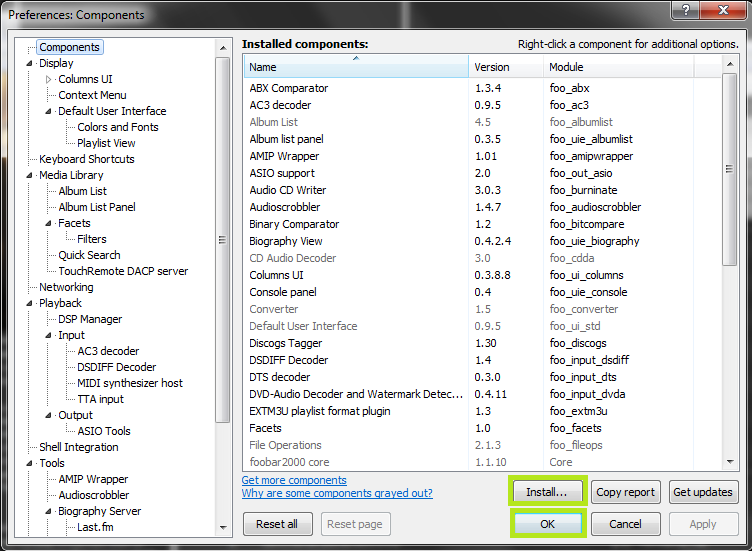
Go File->Preferences->Components, hit Install, select the zip file, press apply or okay. On older versions of foobar, you may need to unzip the .dll file first, and on versions of foobar older than 1.0, you'll need to extract the .dll that matches your version
(check the zip) and stick it into C:\where you've installed it\foobar2000\components. Either way, you'll need to restart foobar to install.Ripping the DVD-A
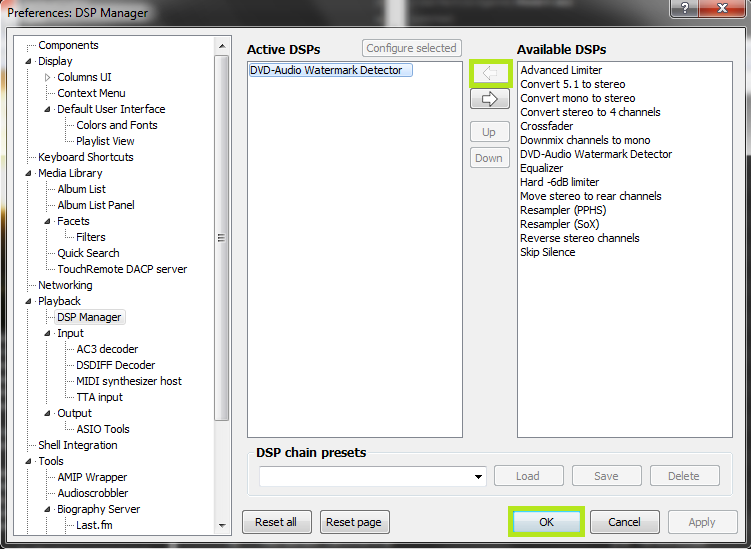
1. Make sure you've got the DVD-A Watermark Detector enabled as a DSP. File->Preferences->Playback->DSP Manager. Select the plugin and click the left arrow to activate it. Hit okay. Your DSP window should look something like this.
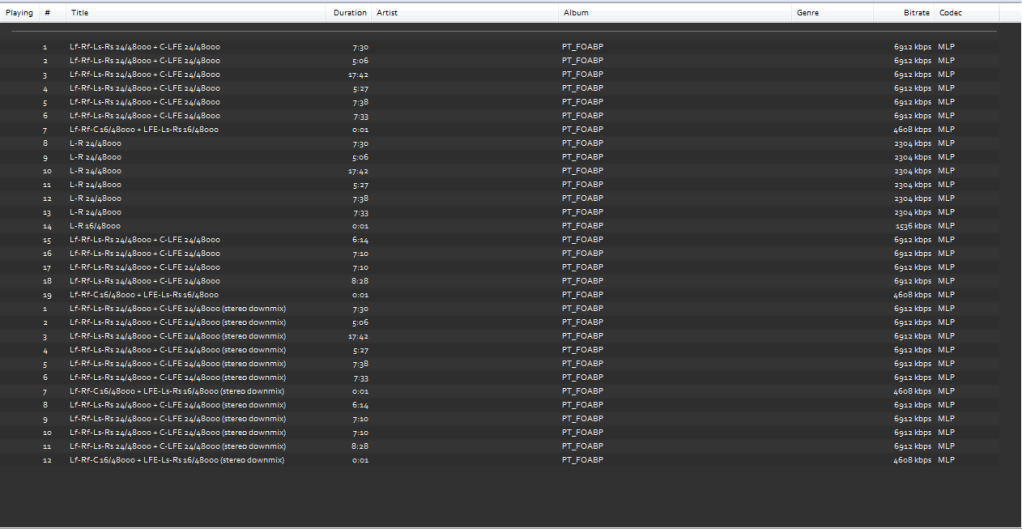
2. Open the DVD-A. You can open a .mlp, .iso, or the AUDIO_TS\AUDIO_TS.IFO from the disc, simply drag and drop it into the main window or a new playlist. In the current playlist you should see the MLP tracks for your DVD-A listed. You may see several sets of tracks, which will be named according to their channels and bit depth/sample rate. Take note of this information, you'll need it later when uploading. Common formats are 16-bit/48000Hz, 24-bit/48000Hz, 24-bit/88200Hz, and 24-bit/96000Hz. Also make sure you note how many channels are on each track. Multichannel tracks will be named something like: Lf-Rf-Ls-Rs 24/48000 + C-LFE 24/48000. Stereo tracks will be named something like Lf-Rf 24/48000. Note that the plugin creates a stereo downmix of all tracks, even when not necessary. Do NOT select those, select the regular tracks.
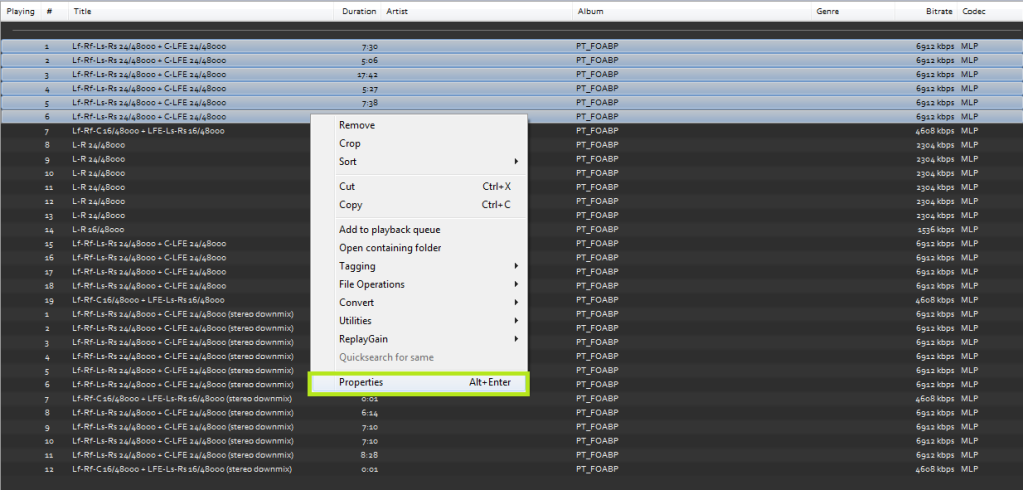
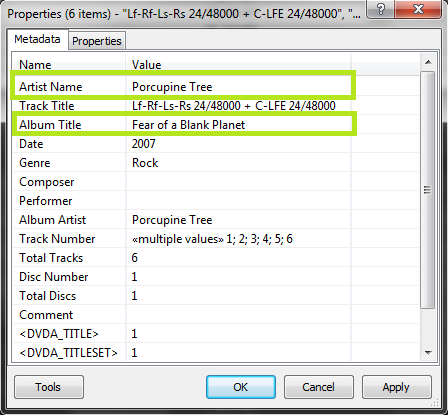
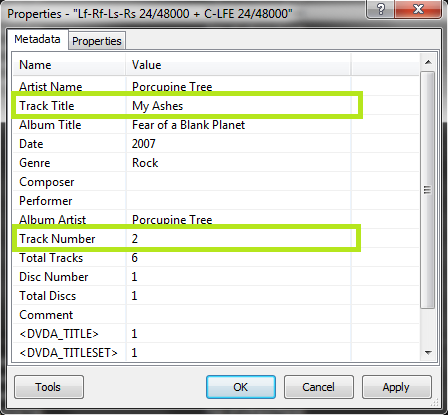
3. To edit the properties of these tracks, first select a complete set (if there are multiple sets, choose the first one). With all of them highlighted, right click on one of the tracks and pick 'Properties'. Edit the common fields, like 'Artist Name', 'Album Title', 'Date', 'Genre', etc. Now hit OK. Next, edit the 'Track Title' for each track. You will need to select these tracks individually. You will need to make sure they also have the correct 'Track Number'.
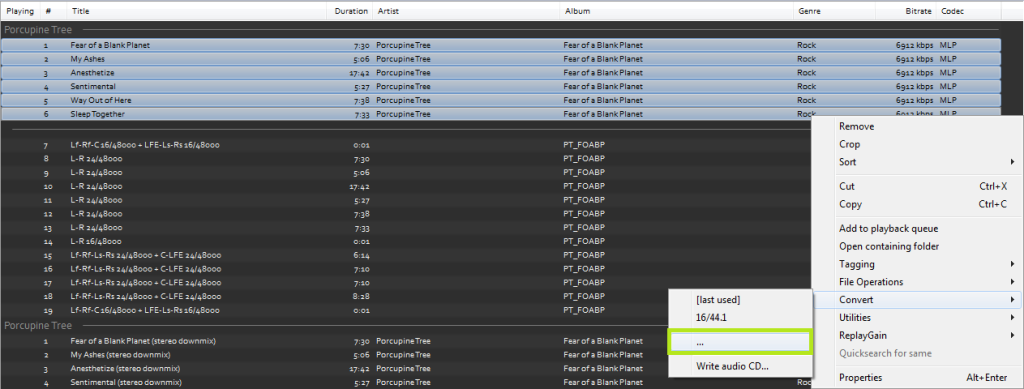
4. Once you have all the track properties the way you want, you can select your set again and right click on one of the tracks and pick Convert-> Convert (or if you've already set presets, ...).
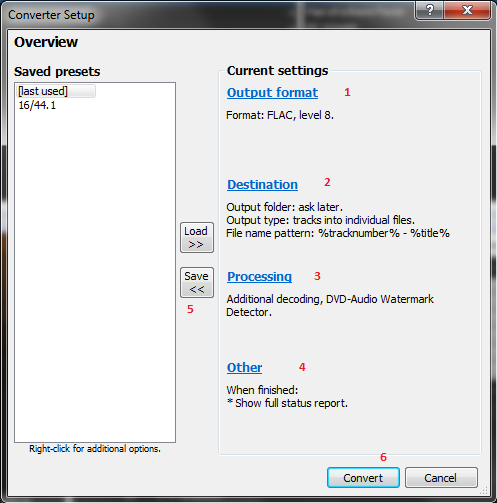
5. Your first time will always bring up the 'Converter Setup' dialog box. If this isn't your first time, you can pick a preset or use the 'last used' conversion method. You can force it to display the dialog box by picking '...' at the bottom of the list.
6. Set the conversion settings as follows:
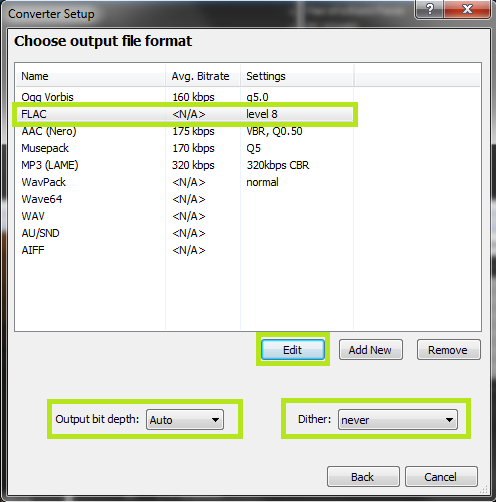
a. Output format = FLAC, level 8
Pick 'Output format', highlight FLAC and pick the 'Edit' button below. Change it to level 8 compression instead of level 5. If you want the best quality files, set the output bit-depth to "Auto" and dither to "Never". You can always downsample these tracks later. Hit Back when done.
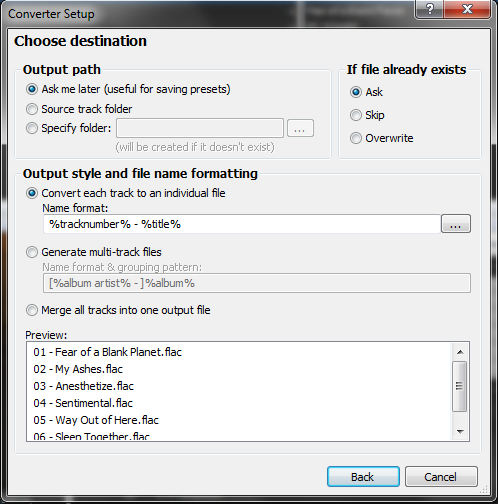
b. Destination. In my case, I have it output to a folder named 'MLP rips'. I have the output type set to 'tracks into individual files' and the file name pattern is %artist% - %album% (FLAC)/%tracknumber%. %title%. You can set it to whatever you like. Make sure it follows the file and folder name rules on site. Hit Back when done.
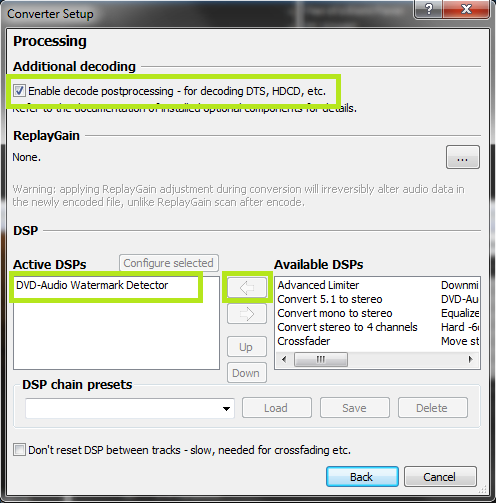
c. Processing. Add the DVD-A Watermark Detector. Enable post-processing. Hit Back when done.
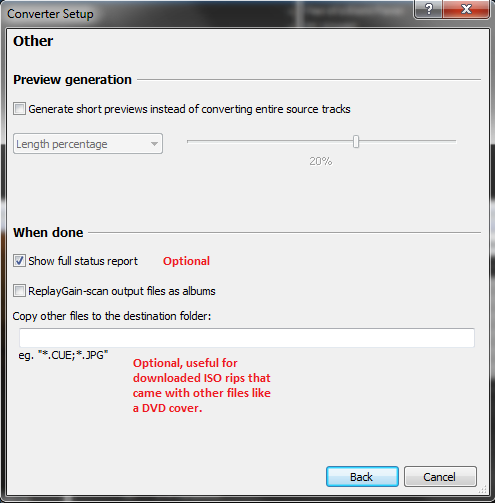
d. Other. You can choose to display the log output after conversion. I recommend you do so.

7. (Optional) Hit "Save <<" to save this preset. Call it "DVD-A Conversion" or whatever.
8. Hit Convert.
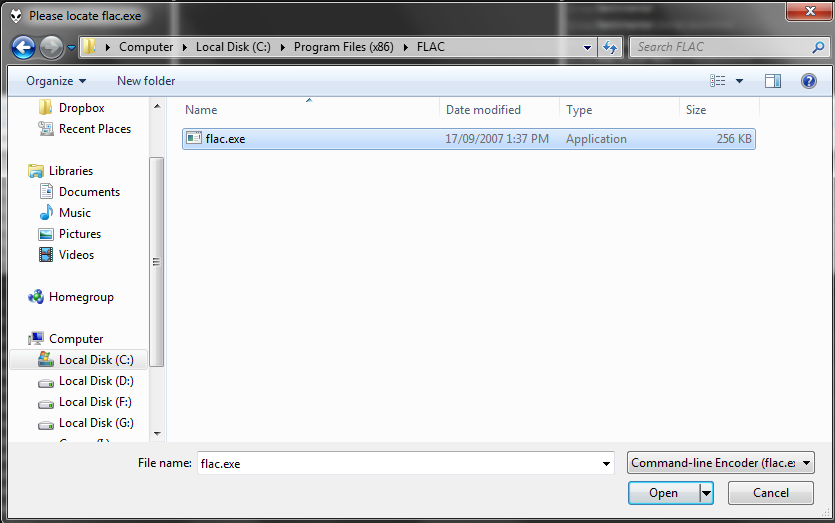
9. You'll need to select the location for flac.exe. By default this is C:\Program Files\FLAC\flac.exe or C:\Program Files (x86)\FLAC\flac.exe. You did install this at the start of the guide, right? You'll also be prompted for a save location if you didn't set one in the destination settings.

10. You'll see a conversion progress bar something like this.
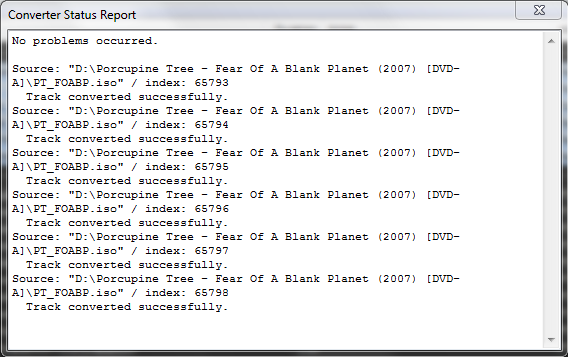
11. Finally, the rip log is displayed. If there were no errors, it should look something like this.
You should now have your DVD-Audio stored as FLAC files on your machine. Make sure the tracks are tagged and named properly before uploading them here. You'll also need to figure out the bit depth and sample rate before uploading. You can downsample the files to 16-bit/44.1kHz if you want to upload a regular FLAC as well, and then convert those to MP3/AAC/Ogg if you want to.
Please share your comments and experiences on the comment area.
Similar Posts:
0 comments:
Post a Comment