Why would I want to use BitTorrent instead of some other method?
1. Supports error checking.
2. Flawless start/stop ability.
3. More control over which files are transferred first.
4. No need to install extra software (if you use uTorrent)
5. Easy security. Nobody can download anything without the torrent file. Also supports encryption with the click of a button.
How to do it: (Note: I use uTorrent 1.8.1b build 12549 Second note: screen shots of all important directions are included after every step)
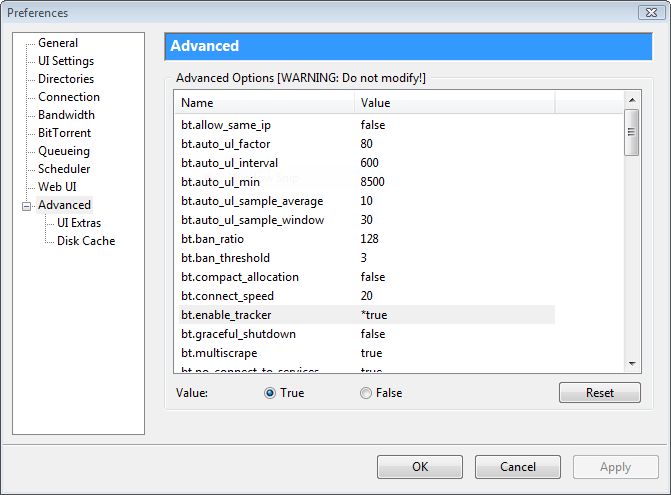
1. Enable the tracker in uTorrent's advanced preferences: First navigate to the advanced option tab and then find the bt.enable_tracker option and change its value to true.
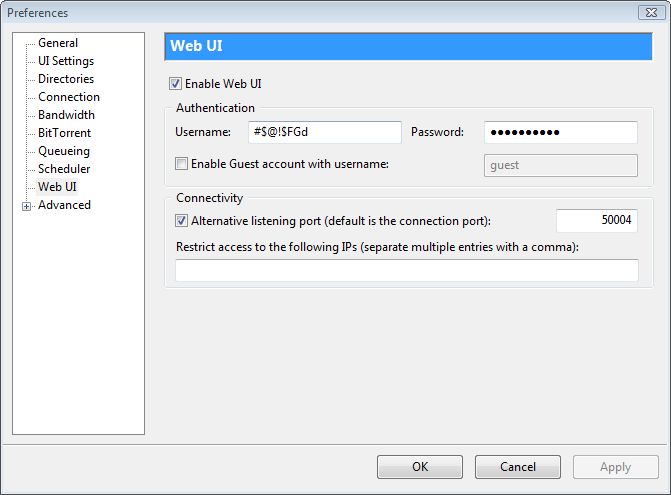
2. Assign a listening port for your tracker: To do this click on the Web UI tab in the preferences. If you haven't already click "Enable Web UI". If you don't actually want to use the Web UI and don't want others using it, type random characters into the username and password fields. Chances are if you have a totally random username and password that you don't even know, nobody will be able to guess it. Then check the alternative listening port box and enter a port number that you aren't using yet, i.e. different from the other BitTorrent port you're using for normal transfers. You will need to forward this port on your router if you plan on transferring outside of your local network. Even if you don't plan on it, it's best to do it anyway because it makes things easier down the line, and this guide assumes you forwarded the port.
3. Create the torrent file: Do this the way you would normally create a torrent file, the only difference will be the tracker you enter in. First you need to find out the IP address your ISP assigned to you. To do this go to http://whatismyip.com/ and use that IP address (should look something like this(different numbers though): 23.72.25.34). Unfortunately this doesn't work very well if you have a dynamic IP address. If you have a dynamic IP address it will be better for you to use your local IP address. To find out that IP address go to the start menu, click run and type in "cmd" (no quotes) and click enter. In the box that comes up type ipconfig and hit enter. The IP address you will use will be marked as IPv4 address. Alternatively, you can set up a DynDNS account and use your domain you get there in place of your IP address. In any case copy the IP address that you will be using into the trackers box on the "Create a Torrent" window. Then add "http://" (no quotes) to the beginning and add the listening port you made earlier to the end, but put a colon between the IP address and the port number. Lastly, add "/announce" (no quotes) to the very end of the whole thing. Also, since this isn't on a private tracker, you do not need to have private torrent checked but it won't really hurt anything. Then click the "Create and save as..." button to create the torrent.
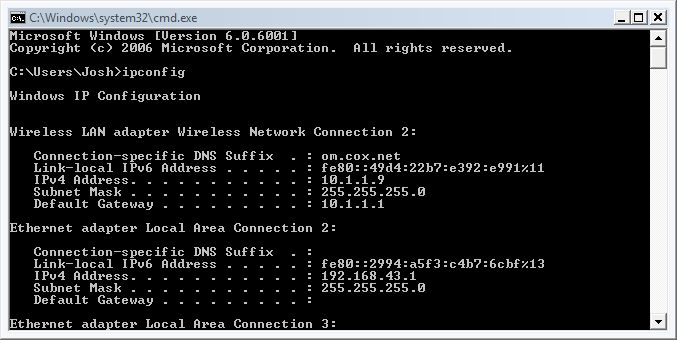 Note: If you have more than one NIC on your computer, figure out which one you use.
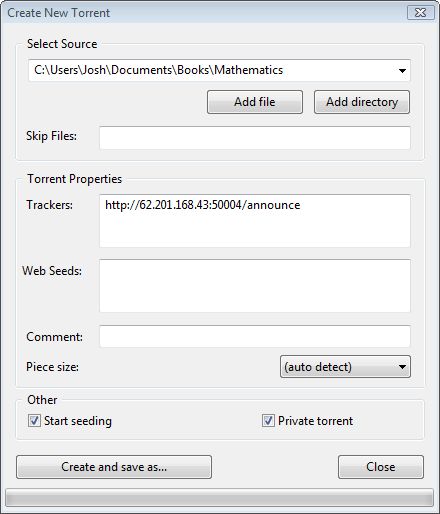
4. Now all you need to do is copy the torrent file you just made to the other computer and open it there. It should act just like a normal torrent that you would download from any normal tracker.
WARNING: Do not add a private tracker to the list of trackers if you are using this method. Doing so will cause your client to report incorrect stats back to the private tracker and that will be viewed as cheating and it will result in you being disabled. Most trackers do not accept ignorance as an excuse, so be sure you do this correctly.
0 comments:
Post a Comment